So what's a girl to do when she is out of time to think of and implement her own ideas?
THAT'S RIGHT copy someone else's!!!
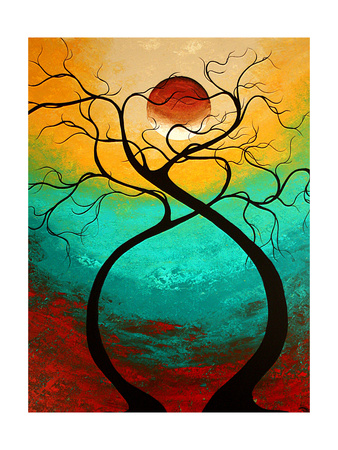
So the other day I went a browsing on art.com for some inspiration (an idea I got from another nail blogger who did a yellow flowers design but I can't for the life of me find it again so if anyone knows let me know so I can credit her =]) and came across this lovely picture By Megan Aroon Duncanson
"Lovely" nail pictures after the jump ...
So I use the word lovely because to be honest the macro camera shots capture the brush stokes of the acrylic a little too well, so the trees on the nails look better in real life - more whispy and tree like than they do on the photo.


so first I did the background with various polishes in my collection,
since it was just a background and the tree I wasn't too bothered about making it super neat but I quite liked the look of the manicure before the addition of the trees, so just in case everything went wrong out to the garden I went to photograph them before potential disaster of black acrylic paint set in.

Some of the colours I remember using where
Barry M Gelly in Mango
Barry M Gelly in Guava
Barry M Gelly in Watermelon
Barry M Nail Paint in Black
Barry M Nail Paint in Matte White
Sinful Polish Yellow
and a Red Rimmel varnish I have
but to be honest I was sat surrounded by about 20 different nail polishes I had pulled out to try get the colours I needed.
The green for example is a mix of the sinful yellow a collection 2000 yellow and some random blues till I found a blend i was happy with.
There was also a lot of colour layering to get the mixes right - especially on the sun.
All I did for this stage was get a fine nail art brush I had from a set from ebay some acetone to wash it out and lined dabbed and sploched (technical term) my way to this.


Black acrylic paint my fine art brush and a tiny dotting tool to create the 'wispier' branches and this was the final result =]

The camera is not kind to tree branches it seems and as I said they look much better in real like than they do caught on camera

I also learned that
taking a photo of a laptop screen and a nail at the same time with out sun glare, flash problems but still getting a nice picture of the nail is near impossible, this picture was the best of a bad bunch but I thought I would add it anyway.
All in all as an experiment I'm pretty chuffed =]
No comments:
Post a Comment